
The "marker quest"

More on my ongoing love-hate relationship with markers, searching to find a way to incorporate them into colored shaded work. My first attempts were not bad (click here to see it), but I wanted to try out other styles. A friend (thanks Jane D.!) pointed me out to the incredible work of Nicole Little (see a great example of her work here). One interesting fact is that Nicole's is 11x14inches, allowing much more room for detail than the small artist tiles I am currently working with.
[clear]
A challenge!
Still, it was an interesting challenge: what can I learn from Nicole's technique? I noticed the following from that particular piece:
• Gradients were worked in streaks of similar colored markers
• White highlights must be either left white from the very start, or added later with an opaque medium such as charcoal pencil
• Although transparent and dimensional, Nicole's work does not strictly follow the rules of traditional 3D shading with a very definite source of light, the shading goes in all different directions
• Although apparently colorful, there is a definite limited palette in her work, about 4 different hues
• Gradients and shading is sometimes achieved through heavy use of stippling (dots). In that picture, she is emulating Klimt
• There might be some sort of opaque medium used afterwards, to create light dots over the marker background
First step: work on a picture to learn from the master

This was a fun exercise! Obviously entirely crude compared to Nicole's beautiful work -- and yet, if if weren't primitive, I wouldn't be learning, right! I'm super happy with the results, was very enjoyable to make. This is what I learned:
• In the 5x7 inches size paper I used, the marker streaks become much too apparent. It is difficult to create good blending through this technique on a smaller scale.
• The details and patterns are also very difficult to work on a smaller scale, the marker tends to bleed because it's difficult to be precise (but it could also be the paper).
• The paper I picked (Bristol smooth) did not like the layered markers, it was disintegrating before my eyes, I had to stop layering at one point.
Second step: shading!
I used my brand new Copic gray brush markers and added lots of shading. The entire drawing grew dull (it made me panic for a moment): I almost liked the first one better!
After a little while, I couldn't stand those marker streaks and I pulled out my faithful colored pencils, and added some white highlights, but the piece was still dull.
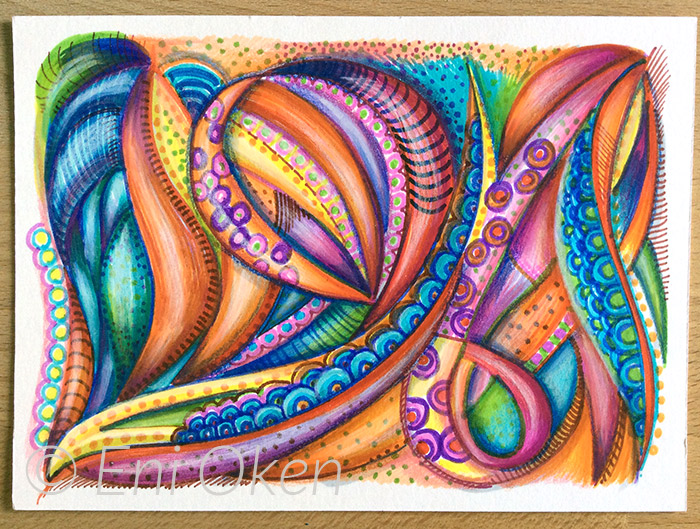
Third step: more highlights!

In an attempt to bring back some of the brilliancy of the first marker image, I pulled out some super saturated pencil colors and brought the picture back to life a bit. The final step was to add details using an opaque gel pen. I really like this result!
This is what I learned:
• Even though the first picture (only markers) is fun and colorful, it lacks a bit of depth and doesn't look finished. Blame it on my lack of knowledge on how to use markers...
• To create better results, shading principles STILL apply, even with the absence of a definite source of light.
• Paper needs to be able to withstand quite a beating. Markers really abuse the paper.
• Let the markers really dry out before using any other medium on top, such as colored pencils.
What a fun exercise! Although obviously influenced by Nicole's picture, this exercise allowed me to experiment first, and subsequently adapt some of my own favorite techniques on top of the first layer. This is a very important part of the the artistic discovery process: first emulate, then extrapolate.
Here is the image inside a frame for you to have an idea of how large it is:

The next logical step is to take the techniques I learned and incorporate it into other drawings. Stay tuned...