
Fun with Jo's Technique
Very exciting week at the Shading Zentangle® Facebook group: we are exploring the wonderfully dreamy tangling techniques which have become Jo Flaherty's signature style. Jo is my guest artist at the blog this week, you can catch the blog post here.
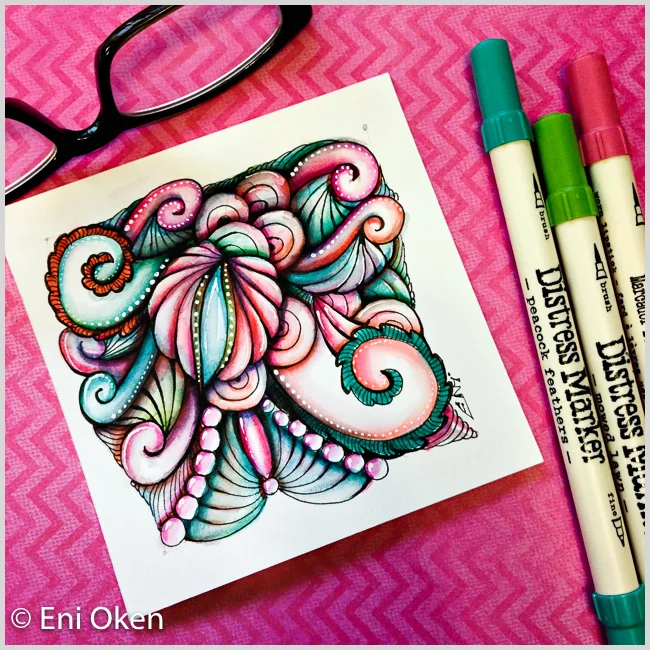
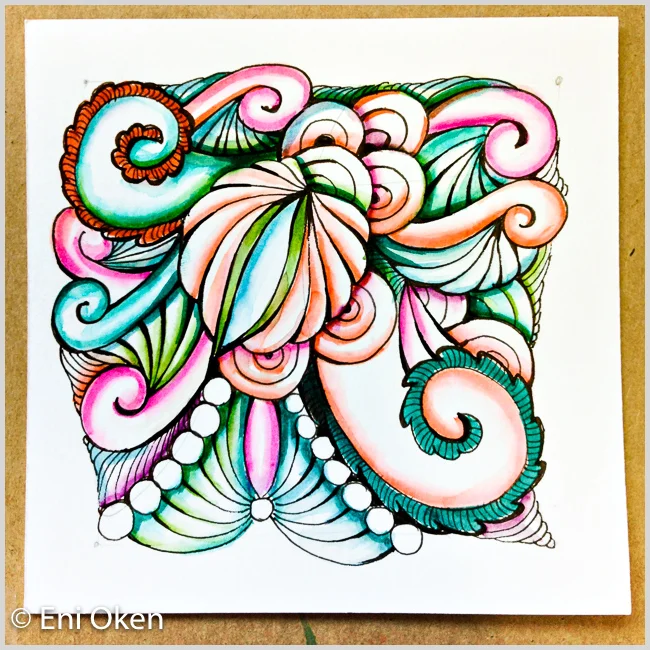
Here's my "Jo-look-a-like" tile, using her signature style which, among other things includes using curvaceous elements, avoiding repetition, alternating colors and using large shapes.
As I suspected, I have gained NEW appreciation for Jo's technique, for her patience and talent in producing her lovely pictures.
I started by selecting a bunch of tangles which I felt matched the necessary requirements: random fillers with round strokes and lots of white space.
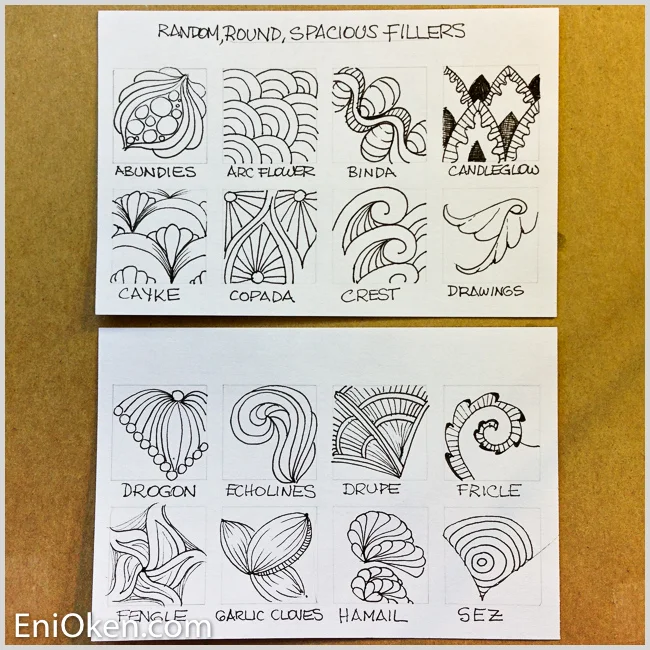
I'm not used to drawing in a random way -- I prefer to work on one string section at a time and repeat the same pattern for a while, to get my Zen Magic Moment. To help overcome this difficulty I used the recipe cards as reference, picking one pattern or another as I drew the line art.
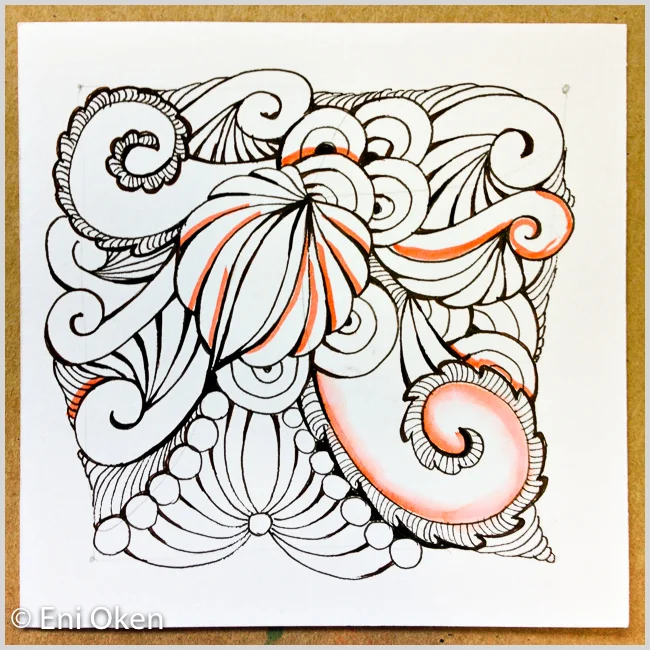
I used my distress ink markers -- and added random lines alone the edges, as Jo instructed.
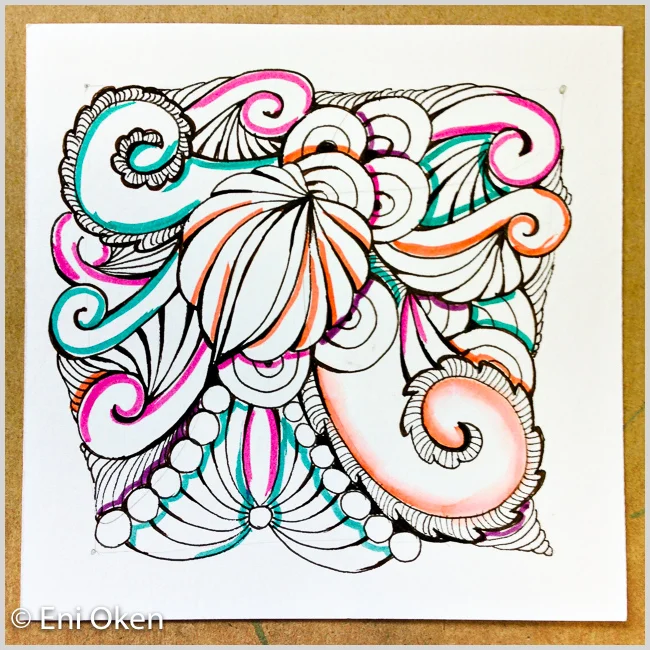
I used a regular brush with just a touch of water and smoothed the markers out. Dry and repeat -- MANY TIMES.
This picture below has about 3 layers of color applied over the shapes. Notice how I varied the color on each shape, adding different tones within the same shape for color variation and depth.
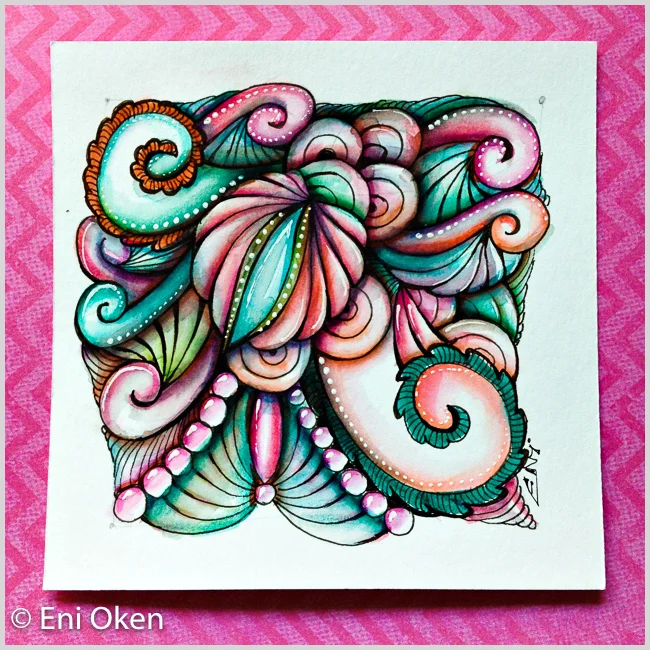
This is where I started to appreciate Jo's incredible patience and talent even more. The following picture has about 6 SIX layers of colors on each shape. I could have gone for more (and according to Jo, each shape has 10 or more layers!!!!!), but I didn't have the patience and declared the picture done!!!! The final touch was to apply white gel pen dotted lines and highlights.
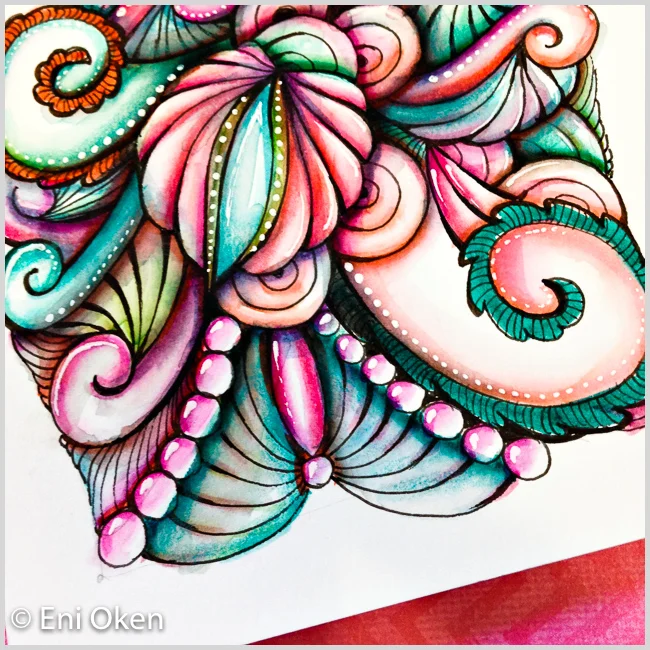
Here is a close-up. As I already knew, layering is FUNDAMENTAL to achieve that dreamy ethereal look of watercolor. However, you've got to have patience!!!!!
I'm very happy with this experiment. I feel like I could have taken more care with the blobs that formed from the distressed inks, but I like that random look and just left them.

What I learned!
This was a wonderful experiment and I'm glad I did it. I did learn a few things:
You don't always need a light source to produce great colored shading (Zentangle has been saying this for years);
Confirmed that layering -- colors, shapes, lines -- is fundamental to produce deep, interesting results;
Some people have patience to create little lines and apply heavy shading, others have patience to apply what seems to be an infinite amount of layers of colors;
Every artist reaches their Zen moments differently and that's OK!
Even though I find the results stunningly beautiful, I prefer to work in a more repetitive way, working randomly makes it difficult for me to get my Zen. Something to think of and perhaps work on.
I'm sure that this is going to help me and translate into my art somehow down the line, but right now I just have to go back to doing tiny little repetitive lines! :-)
Thanks again, Jo, for such inspiration! I'm sure all of us participating in the challenge have even greater appreciation for what you do!!!
Copyright 2017 Eni Oken