Tan Treasure Video Lesson

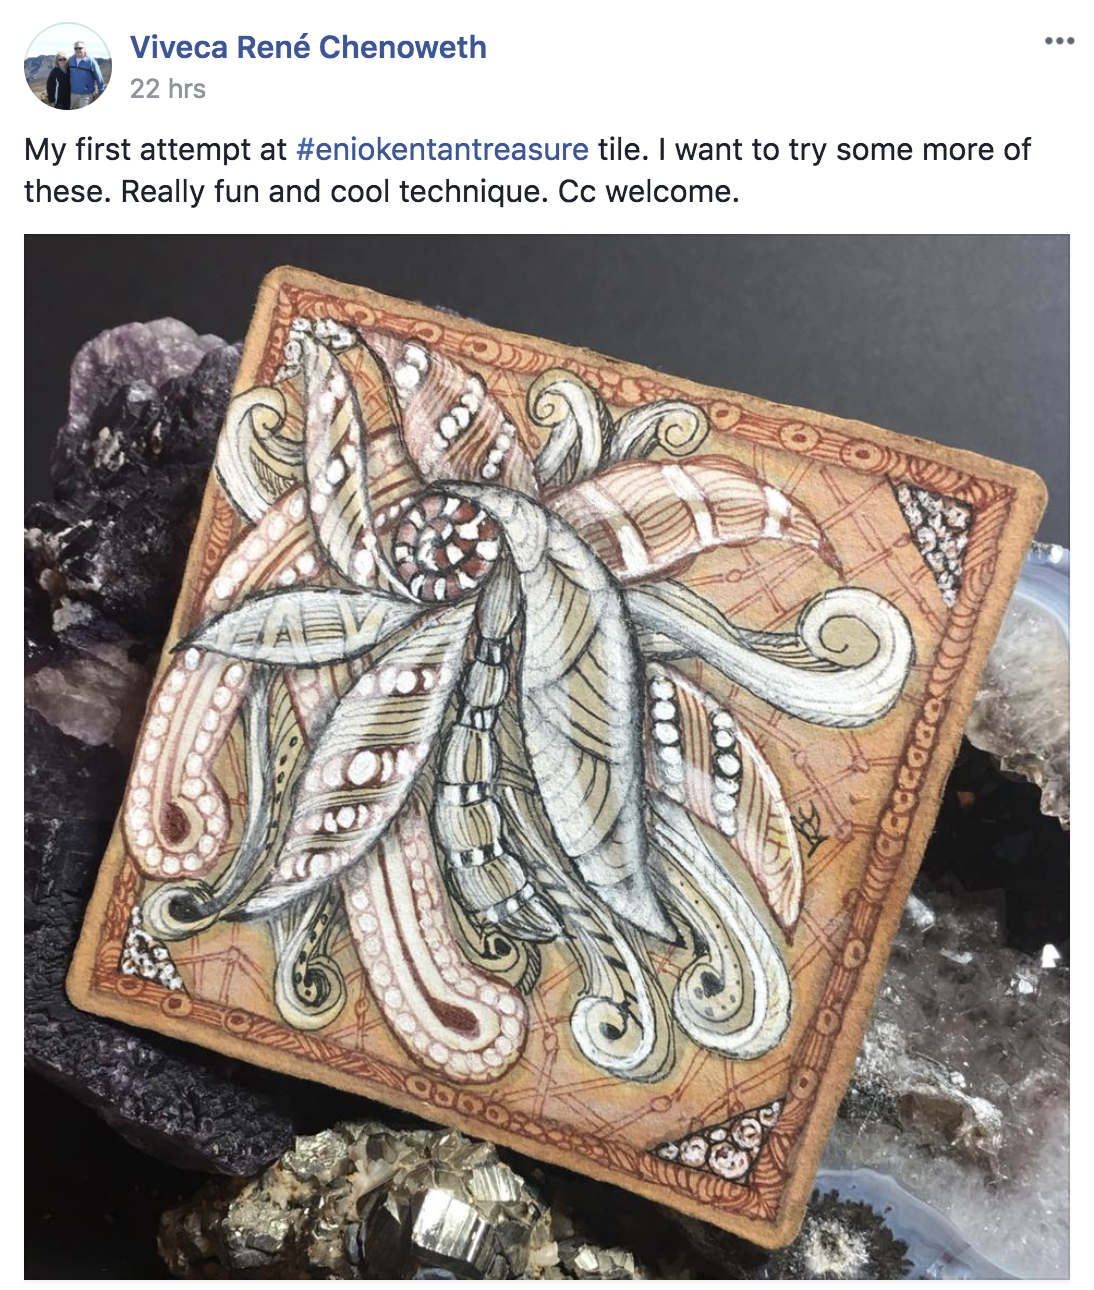
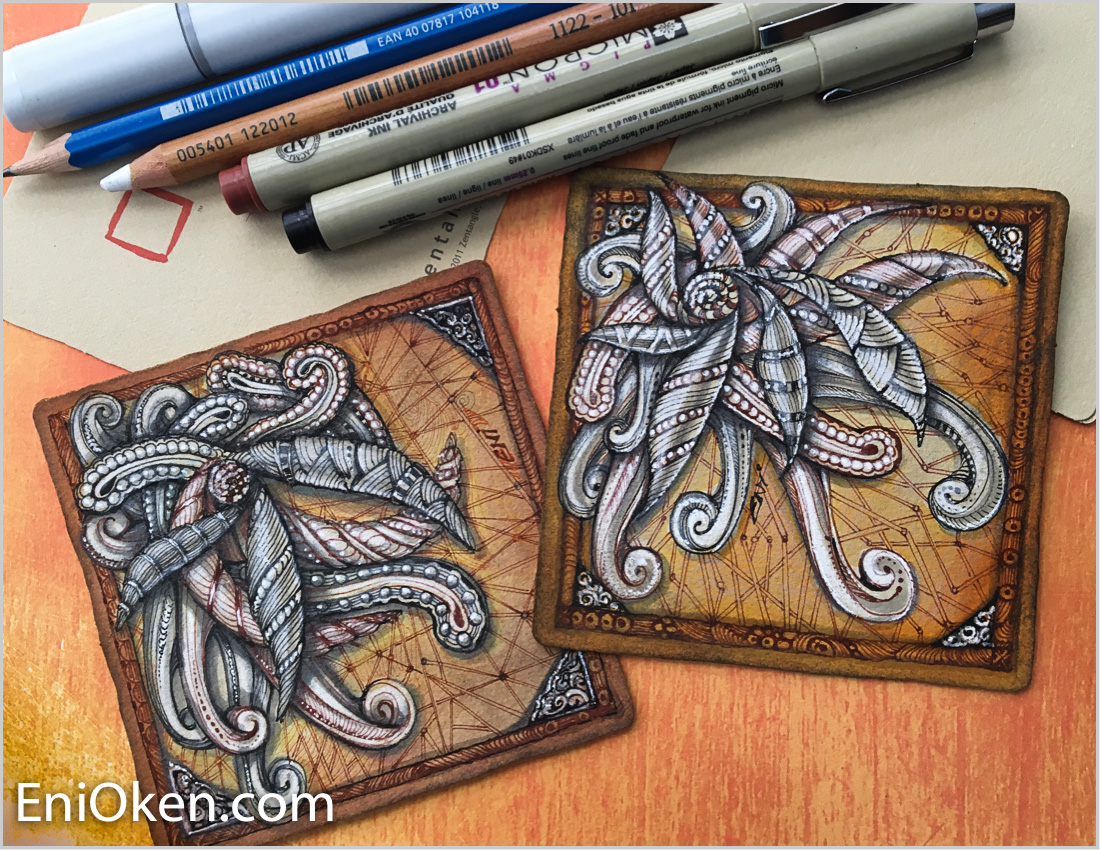
Renaissance techniques over tan tiles can produce amazingly striking images. This is one of my all time favorite tiles, and in this lesson I show you EXACTLY how it was created.

In this lesson You will learn:
How to use Zentangle® Renaissance techniques with brown and black pen
How to use add white higlights and dark shadows
How to produce an antiqued, treasure map look
And so many tips and tricks!

The lesson you were waiting for: how to create STUNNING RENAISSANCE TILES over tan paper!
Materials and Supplies needed
Most of the supplies you probably already have. The unusual items are: tan paper tile, white pastel or charcoal pencil, brown pen and orange ink (or watercolor).
Tan paper and tiles:
Zentangle official Tan tile (this is the one I use)
Optionally, you can also use:
Strathmore Toned Tan Artist Tiles (a little thinner than I like)
Thunderbolt card stock (a little thinner than I like, but excellent value for the money).
Light desert tan 4x4 cards or darker Brown Kraft fiber 4x4
General pens, pencils and supplies:
Copic Sketch gray marker N2 and N4 (you can also use just a graphite pencil if you prefer)
Graphite pencil for shading (my favorites for this project are F and 2B)
Rust dark orange ink or watercolor. I use distress ink Spiced Marmalade in the video, but even better is Rusty Hinge by Tim Holtz. Also a Paintbrush and water.
Raw Umber Pan Pastel (or you can use dark brown colored pencil, just takes longer)
Light gray and dark brown colored pencils
White gel pen. I use Sakura Gelly Roll.
White charcoal or pastel pencil:
You will need a white pencil made of pastel or charcoal. My favorite is the Pitt Pastel, but you can also you can also use any white charcoal or pastel pencil. Do NOT use colored pencils, use only charcoal or pastel.
Faber-Castell Pitt Pastel White Medium pencil (get it at blicks.com here or through amazon here
General's Charcoal white pencil . This pencil has very good brightness, but it tends to break a lot during sharpening.

Important!
This lesson is an intermediate/advanced lesson.
This is what people said about this lesson:


Related Artwork


Copyright 2017 Eni Oken
Other copyrights are of their respective owners.